
Ahhh! I did it!! 😆 Honestly, I wasn’t sure I could pull this off when I first thought to do it, but here we are!!
I almost gave up on making art this Christmas
First of all, I want to thank my cousin for encouraging me to keep creating and sharing my art online. I honestly went through a period of time over the holidays when I thought to myself: I’m just gonna cut off all social media and give up on this whole thing. But after I sent her a pic I drew of her incredibly talented daughter Emily Mitchell, she urged me to keep going.
I’m no stranger to the feeling of wanting to give up. It’s been an issue throughout my entire life. I’m not the most patient person (surprise!), so when no one is buying my art I start to think… is it worth it? And not just because I feel I need to make money from it but because I have nowhere to keep it!!
There’s a lot of pressure to make money from our passions and to hit it big online so, yeah, I’m human and I get discouraged if people aren’t listening to my music, reading my books, or buying my art. BUT… once I let that go… once I thought “Ok I can just walk away” it was like something was freed inside of me. It shifted to: “Well, then why can’t I just go back to making it for ME… the way I used to before the freakin internet?” Everything shifted. (It also helps that I let go of acrylics and canvases and all the things that take up a lot of space and now I just store my art in portfolios).
So, yeah, I came really close to giving up. I shut down my Instagram for a while, I stopped posting and deleted a lot of art related posts. I told myself to stick to one thing… writing? Music? But then I changed my mind.
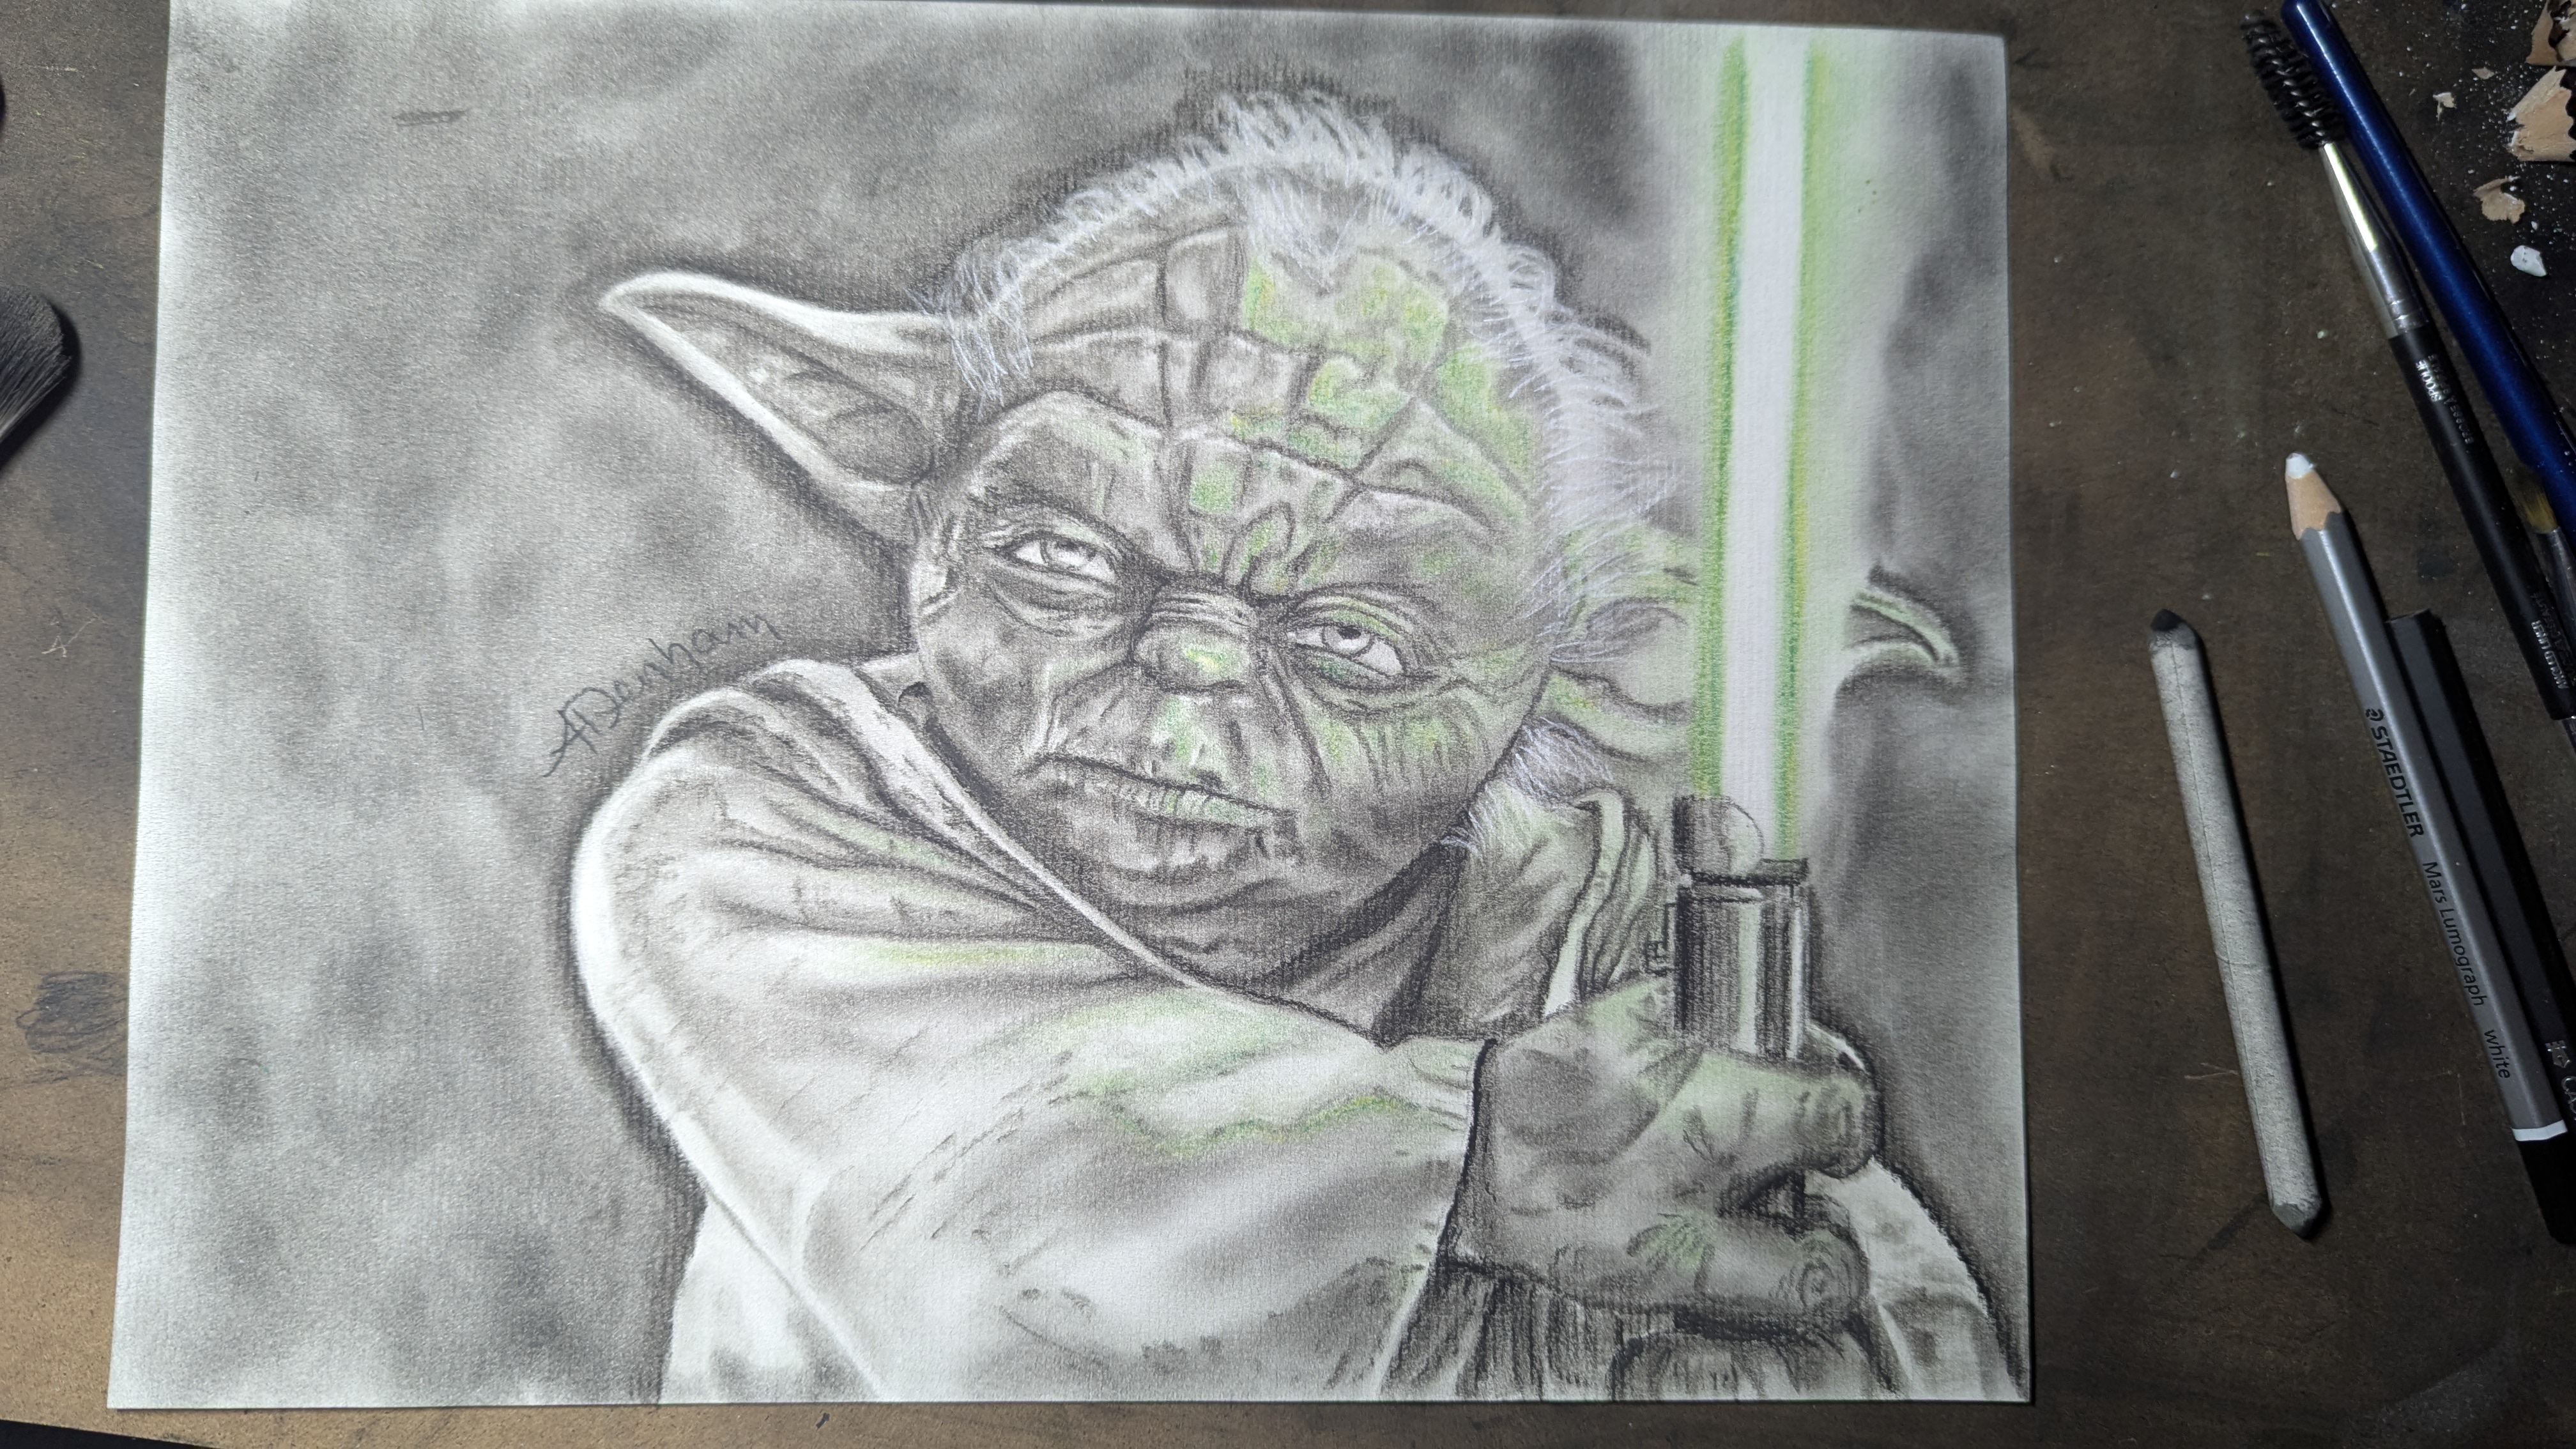
And here is my Yoda drawing! The first thing I decided to tackle after coming back with a new artistic spirit.

Why draw Yoda? Am I even a Star Wars fan?
Fair question. Thanks for asking it… 🤔 though I think I am the one who just asked myself… 😆
Let me be honest: I wasn’t really a big Star Wars fan 🫢 I know. I probably shouldn’t say that out loud. Good thing I’m just typing it here on the internet where it’ll probably stay forever.
But give me a chance here, before you judge me, lol. I always loved the basic idea of Star Wars and the way that it added Taoist philosophies into what became a pop culture sensation. As a philosophical Taoist, myself, the concept really resonates and I love that these movies and shows are sort of teaching Taoist philosophies to people who would maybe never be shown that way of thinking otherwise.
When it came to the actual content of the films, though, I struggled. I wasn’t really from a long line of Star Wars lovers, so it wasn’t really something I was exposed to until my husband was watching it with my step kids. And while I really wanted to get into it, it just didn’t hold my attention. Now that I’m older (and so are my kids) I’m understanding something: I don’t really like the action parts. My brain shuts off during them, so it’s hard to keep my focus. Add to that the fact that my kids were little and climbing all over the couch and asking for snacks when I first tried to watch the films and, well, I never knew what the hell was going on 🤷🏻♀️😆
Now that I have time to slow down, I’ve taken on the incredible task of watching all of the movies and the tv shows. Yes, AND THE TV SHOWS. Now, here is where I’ll lose some people… I kind of prefer the shows 🫣
The process and the tools for my charcoal drawing of Yoda
Drawing part 1: Sketching the outline
- reference photo
- computer screen
- graphite pencil
- charcoal paper
I will not lie, I totally started this one by outlining an image 🤷🏻♀️ I have no shame about this. Artists have been using projectors and tracing for decades. And, honestly, I think it can be really helpful when it comes to learning other techniques and just seeing how the different parts of an image interact.
So, I started this by finding an image of Yoda, blowing it up to the size I wanted, and sketching out the outline as well as important details like the shape of the eyes and placement of his nose. I also made note of where the darkest and brightest areas were. Then came the hard part.
Drawing part 2: Building the base
- makeup brushes
- blending stumps
- charcoal sticks
- knife
- charcoal pencil
It all started with basic lines and shading. So, first, I use the knife to shave off some of the charcoal from the sticks to create a powder. Can you just buy powdered charcoal? Of course! Will? No! 😆 I am far too klutzy to have powders sitting around my house. So, I shave off just enough to make a little pile on my table and begin working from that.
Hint – I use a 2′ x 2′ piece of MDF as my work table. I can pick it up and move it to different desks and tables all over my house and not need to worry about the mess I inevitably make on it with the charcoal.
I use the blending stump and the powdered charcoal to put the first definitions into the most important lines on the image. I don’t worry about how dark they are, just yet. I always go back and make some darker as the image progresses. But it’s important to remember that less is more and you can always add more later.
Next, I get my brushes out and start adding shading into the larger swathes of space (ie – the cheeks, the ears, the forehead, the shirt).
I just keep repeating this over and over across the image, adding more and more detail as I go. Sometimes I leave a little on the right side undone because I’m scared I’ll mess it up with my hand as I’m working.

Drawing part 3: Adding colour and detail
- some of the same tools as above
- chalk pastels
This one needed colour and I’m really glad I did it. It makes a huge difference and I’m leaning toward adding colour to more of my charcoals in the future. For the colour effects I used chalk pastels and treated them almost the way I treated the charcoal.
I shaved the pastels with a knife to create a fine powder but let me tell you, it didn’t stick to the paper as well. Could this be because I bought cheap pastels? Probably 🤷🏻♀️😆🫣
But it helped get me started. When I was ready, I went back and added more definition and pop to the colour by directly drawing with the pastels and then smudging it.
For the final touches I went back and forth between working on the colour parts and adding more detail throughout the entire drawing.
Drawing part 4: The finishing touches
The FINAL FINAL touches were done with sharpened charcoal pencils (usually hard) to just add very clean details around the eyes, wrinkles, etc.
Check it out on TikTok and follow me there for more art, music, and all the good shit 👇

Leave a Reply