
I don’t have a lot of photos for this one 🤷🏻♀️ I’ve shared other art and showed the process of creating it, along the way, for my Instagram and TikTok but this one I just made quickly and without thinking about social media and my website.
The motivation behind this charcoal drawing
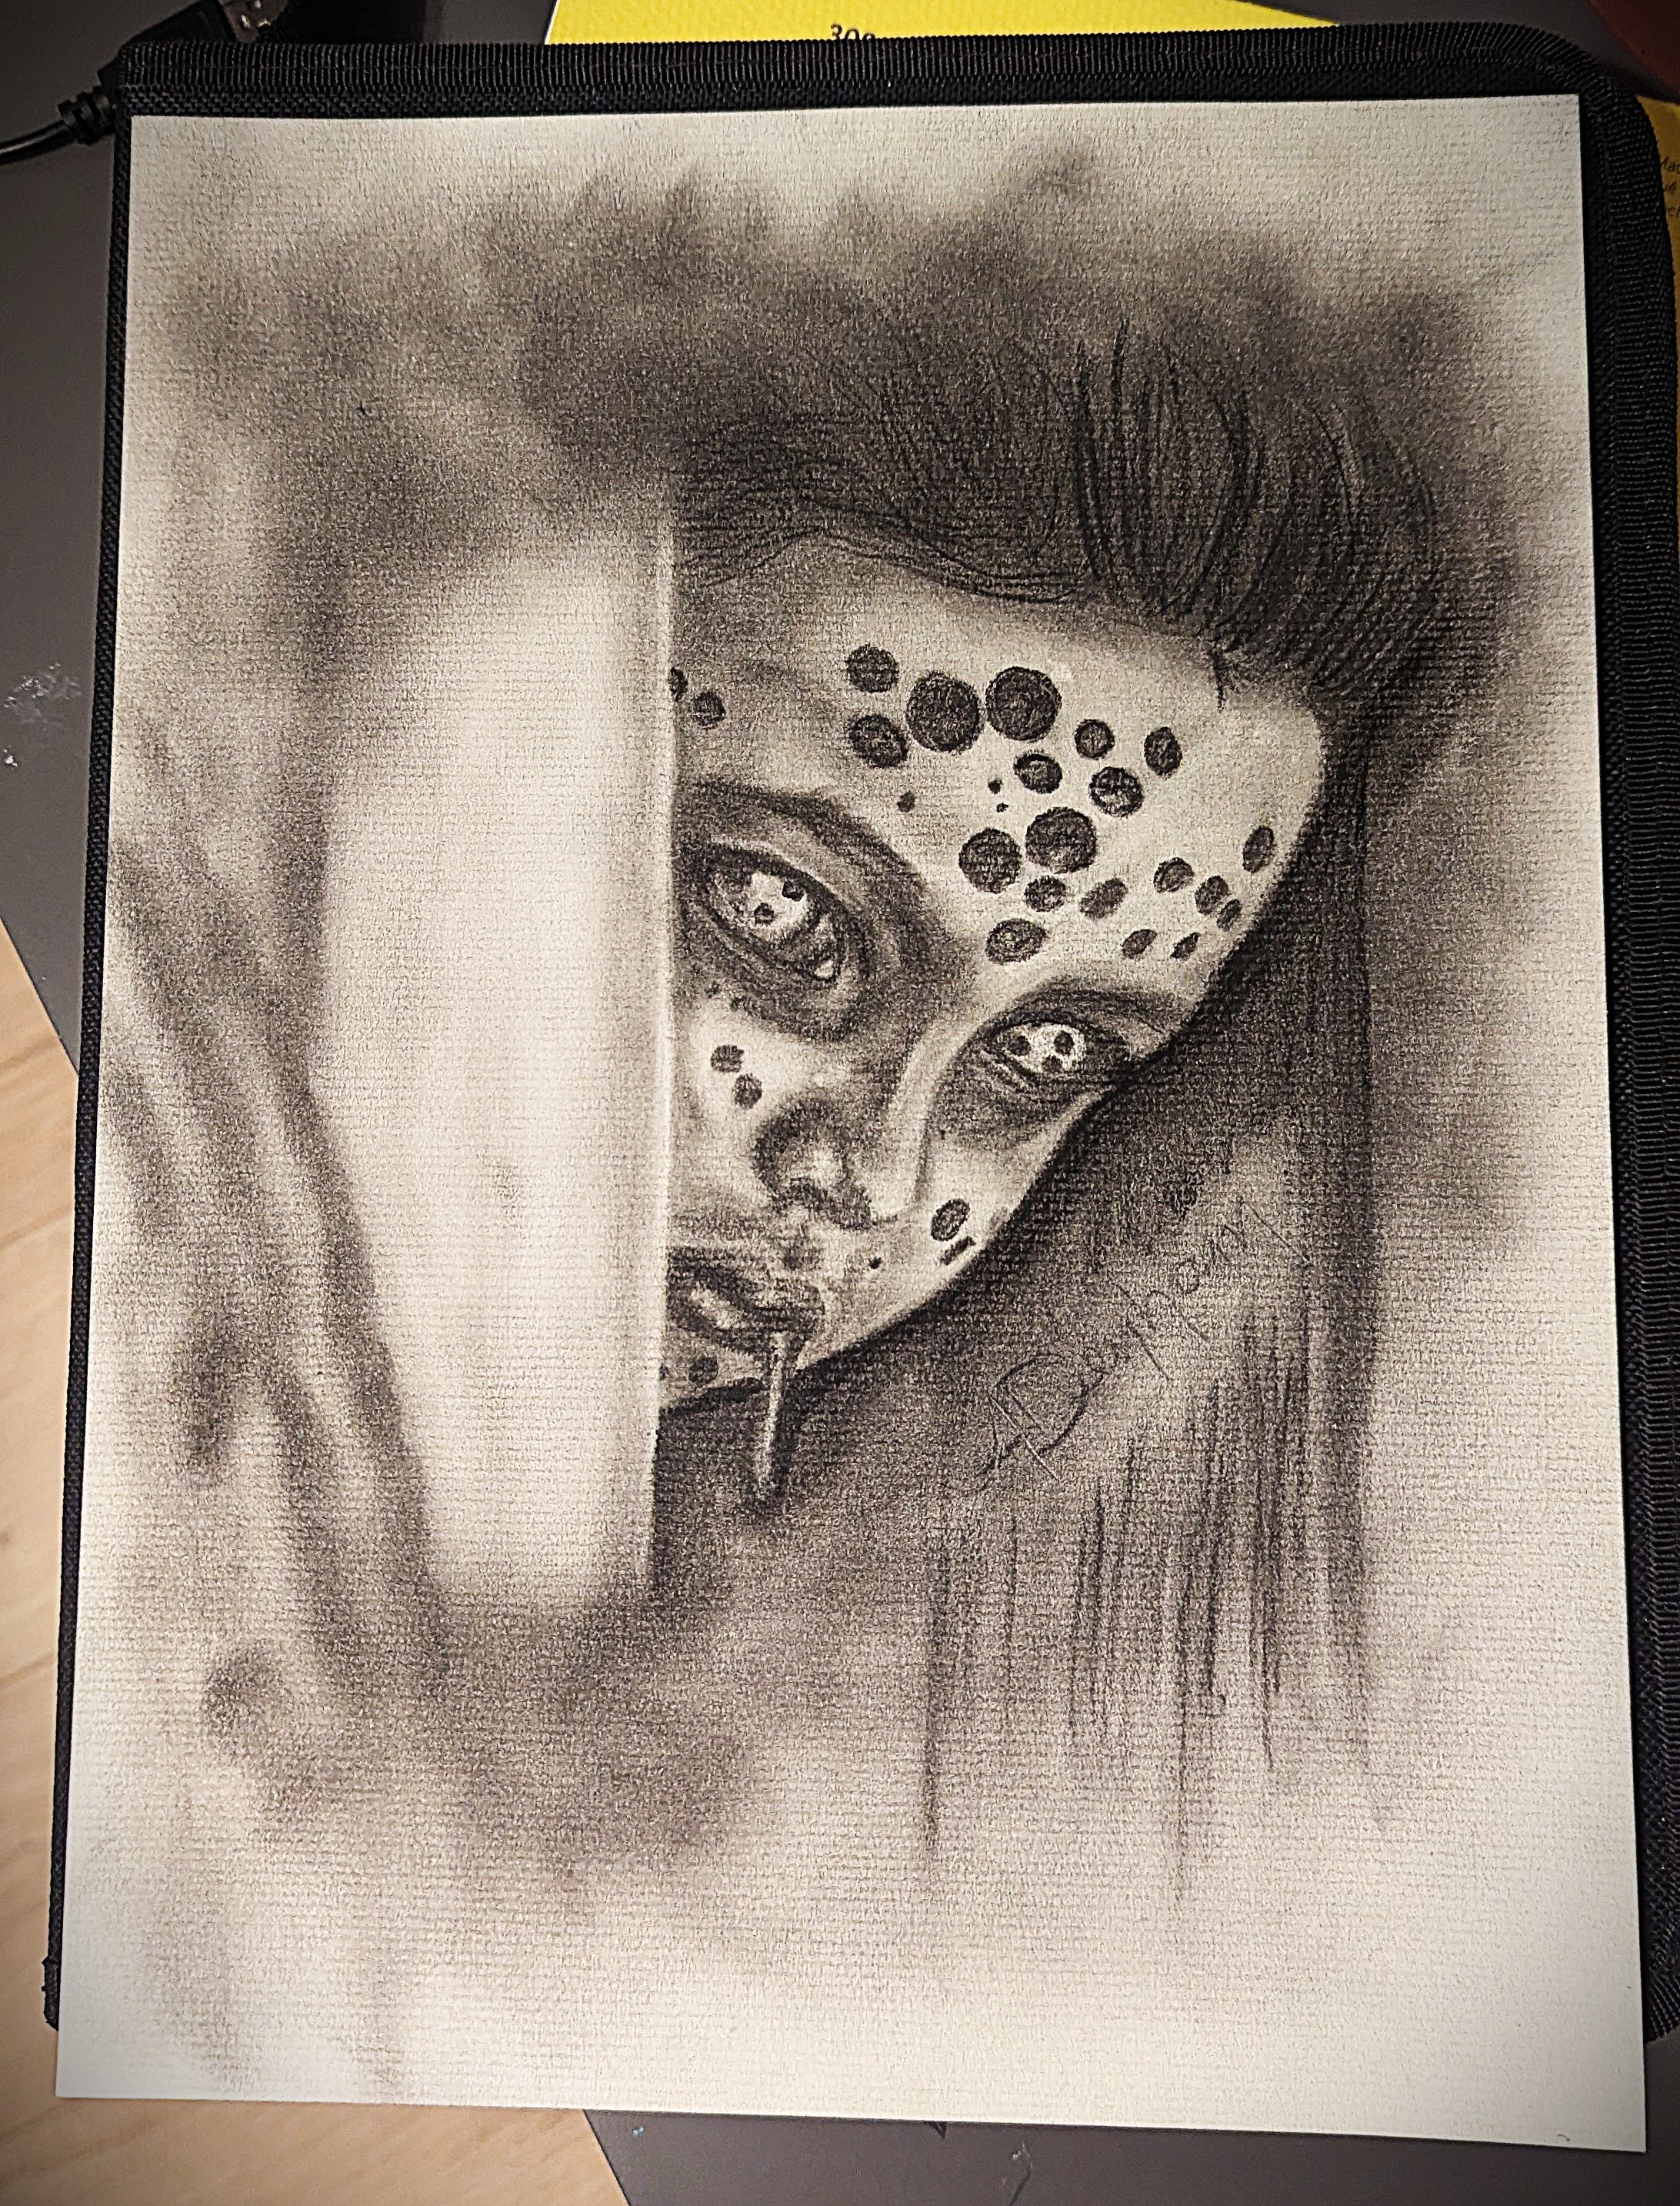
Picture this: Sicily, 1926… no that’s not right 😆 Nova Scotia, 2025… I felt inspired to create Christmas gifts for some of my family members. After my cousin’s daughter Emily Mitchell saw my Halloween drawing of Beetlejuice she shared with me how much she loved it. She’d also recently been featured in the film Vicious, playing and incredibly creepy character. It didn’t take long for me to decide what my cousin’s gift should be this year.
Buuuut, as life would undoubtedly have it, things got complicated. My husband had to go in for surgery at the beginning of December and both November and December were quickly taken over by other responsibilities. It happens, right? And always at those inconvenient times 🙄😆
So when I realized that I’d already missed the shipping cutoff for Christmas (and hadn’t even started making the drawing, yet) I got to work. And I worked so fast and in such small spurts between other responsibilities that I got zero footage or progress photos 🤷🏻♀️
Anyway, here’s the final product:

To say they loved it would be an understatement and, honestly, my heart is warmed.
This year I was able to send all sorts of artsy gifts back home to family members but this one was extra special. My cousin has been an unbelievable source of love and support in my life and she’s very special to my heart. To be able to share this with her and her family has been a tremendous honour, especially as we find ourselves so far apart.
My charcoal drawing process
I’m not going to go into immense detail in this post but people often ask me how I make my drawings or say that can’t believe I can do it, because they want to do it, too, and haven’t figured out how. Let me tell you one very important thing: PRACTICE MATTERS.
The process:
- Sketch the basic outline of the main focal point. For this one it’s Emily and the edge of the door. (Yes you can totally trace this if you have a reference photo! It isn’t cheating in my books, lol. Sometimes I trace the basic outline and sometimes I take my time with a ruler and various other tools to get the dimensions and positioning of elements correct).
- Sketch the major points of interest in the focal point. For faces these are things like eyes, nose, mouth, etc.
- Indicate the darkest shadows and lightest highlights. I like to do outline-y circle-type shapes for the highlights and actually lightly colour in the darkest areas. VERY LIGHTLY because I often start in pencil and pencil can create a shiny effect that I don’t love.
- Get some powder charcoal or scrape some charcoal sticks to make powder and get to work on those shadows with makeup brushes.
- Use a charcoal pencil to really start defining lines and shading the darkest areas.
- Repeat steps 4 and 5 until you’ve layered up your textures and shadows just right.
- Use an eraser to add in the highlights.
- Seal it and you’re done! 🙂
My charcoal drawing tools
- Pressed charcoal sticks that I scrape to create powder (I don’t trust myself not to spill a thing of pure powdered charcoal, lol)
- A knife to scrape the charcoal
- A variety of makeup brushes
- Smudge sticks or blending stumps or whatever they’re called
- Charcoal pencils
- Graphite pencils
- Charcoal paper
- Chalk pastels (but not for this picture, lol)
- Eraser (I like the little pen-style erasers with fine points and the ones that go on the end of pencils, lol, but it’s good to experiment and see what works best for you)
- REFERENCE PHOTO
- And a whole lot of love ❤️

Leave a Reply